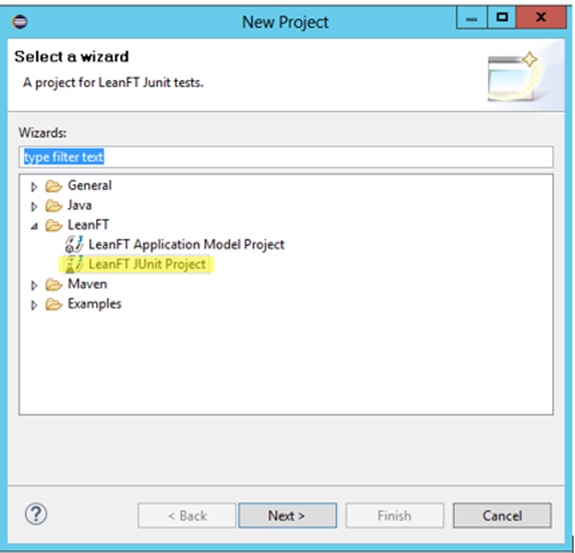
Tests Created in Eclipse
With the release of HPE UFT/LeanFT 12.51, HPE provided the capability for HPE LeanFT tests to be executed from HPE ALM with the results stored in HPE ALM. We found the process to accomplish this in HPE documentation to be cumbersome, and it currently contains errors (which HPE is correcting).
I’m going to show how to accomplish this with step-by-step instructions. This post will show how to do it with tests created in Eclipse, and this follow-up post will show how to do it with tests created in Visual Studio. We will be using the following configuration:
HPE LeanFT 12.52
Eclipse IDE for Java Developers Mars Release 4.5.0, Java 1.7, or higher
HPE ALM 12.50 Patch 1 (required)
I will be referring to HPE documentation in this post. You can see the original documentation for HPE LeanFT 12.52 at the HPE LeanFT Help Center by clicking here.
Create the Test in Eclipse and Export the .jar File
When starting a new HPE LeanFT JUnit Project in Eclipse, you have the option of creating a package. There is a difference when setting up HPE ALM to run the test, so I will show you what you need to do with and without packages.
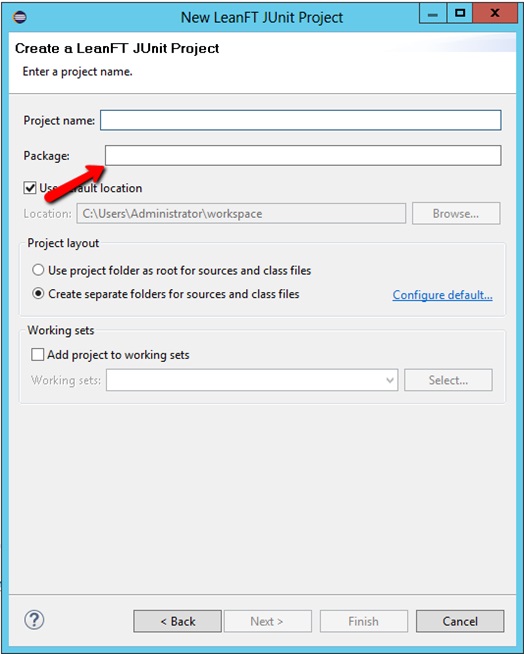
You can either leave Package field blank or designate a package. The language in the HPE LeanFT Help Center makes it sound like you have to enter a package: “3. In the Package box, choose a name for your package. For example, hp.lft.com.” However, it is not required. Use a package if you want/need to or just leave it blank. I’ll show the difference later.
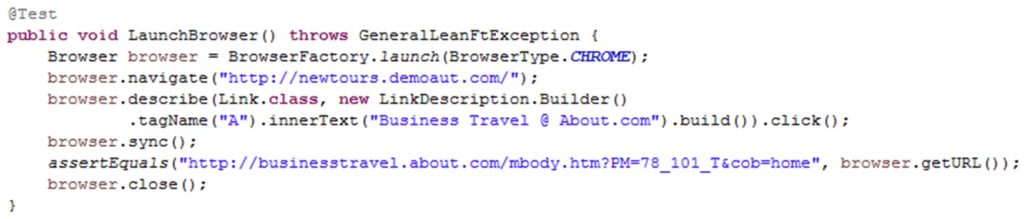
I’m going to use some very simple code borrowed (and slightly edited) from the HPE LeanFT Help Center Code examples (Web Example: Navigate to a Web Site). This code launches a Chrome browser, navigates to http://newtours.demoaut.com/, and clicks the Business Travel @ About.com link. It then verifies the page URL. Finally, it will close the browser.
You can download my project source code and .jar file by clicking here.
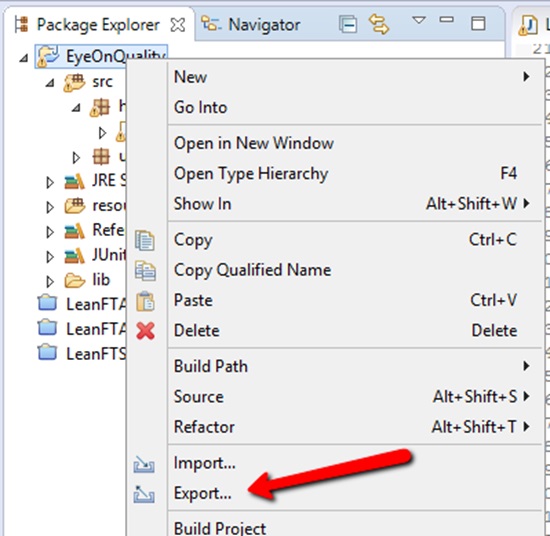
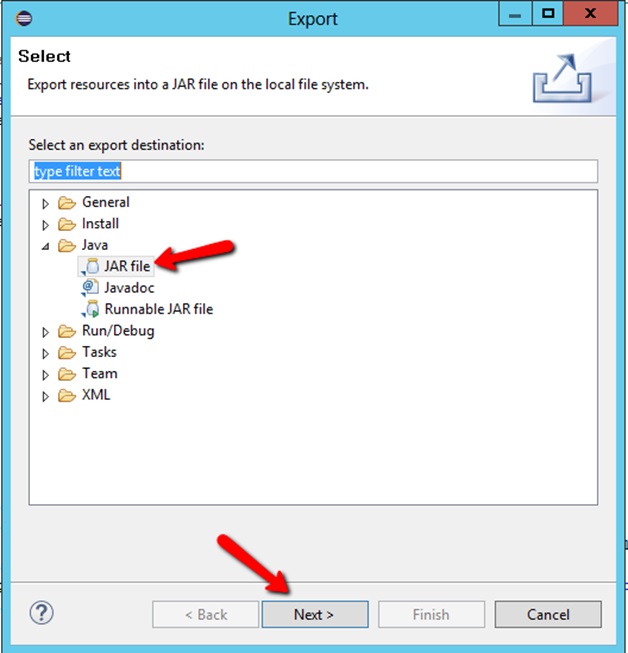
Now that you have your project created, you need to export a jar file. Do this from the Package Explorer by right-clicking the project and choosing Export.
On the Export dialog, choose JAR file and click Next.
On the JAR Export dialog, choose the checkboxes as shown in the image below (“Overwrite existing files without warning” is optional). Also, choose the JAR file location and name:
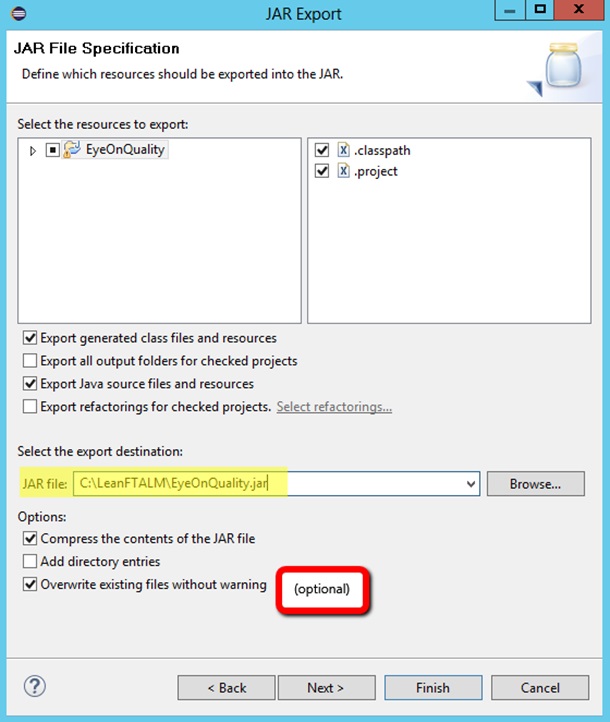
Click Finish. You should now have the test’s .jar file in the selected folder.
Download Required JUnit*.jar and hamcrest-core .jar
HPE documentation does mention that you have to have a junit*.jar file available and reference it from the Remote Agent settings (more on this later). However, it does not mention that the hamcrest-core*.jar is also required (HPE is updating this). You can get both current versions by clicking here. Versions as of this writing are JUnit 4.12 and hamcrest-core 1.3. I am using those versions for the remainder of this example.
Download these files and place them both in an appropriate location. For my use, I simply placed them in a folder I created at C:\JUnit.
Modify Remote Agent Settings and Set ClassPath
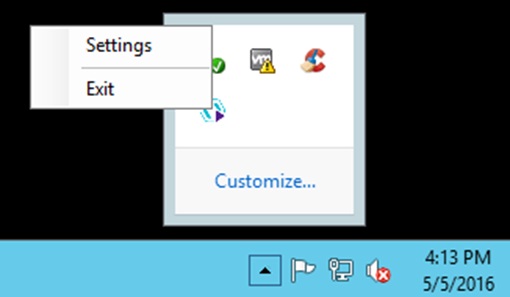
If your remote agent is already running, you can simply right-click the icon in the taskbar and choose Settings.
This will launch the LFTRemoteAgent.exe.config file in Notepad. Alternatively, you can navigate to C:\<install location>HP\LeanFT\Tools\RemoteAgent and open the file in a text editor and modify it.
Near the bottom of the file is a section (leanft) that is commented out by default. Several elements at the bottom of this section need to be uncommented and modified appropriately. For mine, it looks like this:
The most important modification here is to the <javaAssets> element. It MUST contain entries for your %CLASSPATH%, the $LEANFT_INSTALL_DIR\SDK\Java/*, and the full path to the junit*.jar and hamcrest-core*.jar from the previous step (including the file names) separated by a semicolon. The Environment Variable %CLASSPATH% is optional. If it contains the above mentioned paths, then you can exclude them from this settings file.
To use relative paths to your tests in HPE ALM settings, you can also modify the <testAssetDir> to point to the folder where your test .jar files reside.
Configure HPE ALM Settings in Test Plan
An HPE LeanFT test is somewhat different from a GUI or API test, in that it does not actually reside in HPE ALM, but rather HPE ALM points to the location you exported the test .jar file to.
First, start in the Test Plan. Create a new test with a type of LEANFT-TEST.
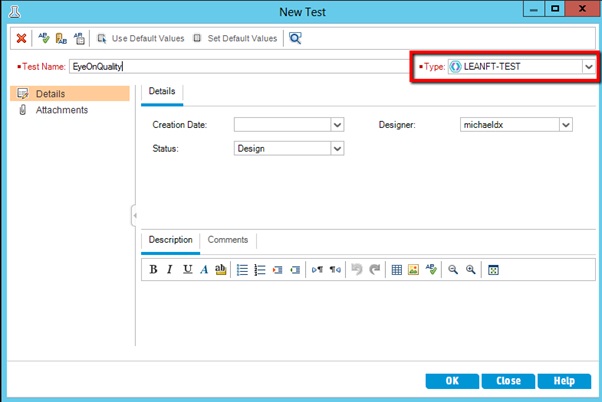
Next, click the Test Script tab. Change the settings as shown in the image below (modify for your paths and test/method name).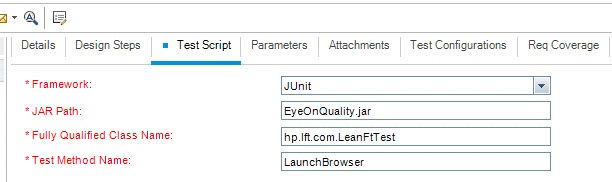
Explanation of Fields
Framework
This is going to be either NUnit or JUnit, depending on what IDE the test was created in. In this example, we created the test in Eclipse, therefore we will choose JUnit.
JAR Path
This value will depend on if you entered a path in <testAssetDir> in the remote agent settings, as described above. If you did enter a value in <testAssetDir>, you are using relative paths and will simply enter the test.jar file name. If you did not enter a value in <testAssetDir>, this will be the full path to your test .jar file, including the file name.
Fully Qualified Class Name
This can be the tricky part. This is totally dependent on if you entered a package or not when you created the test. In my case, I used HPE’s example of hp.lft.com when I created mine, so my Fully Qualified Class Name is hp.lft.com.LeanFtTest, where LeanFtTest is the class in my Eclipse project.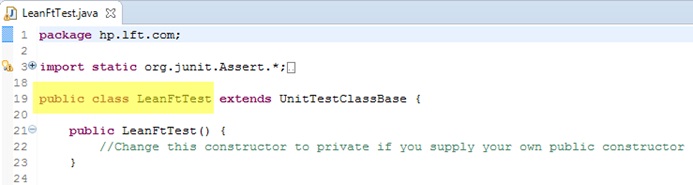
If I had not entered a package, then my Fully Qualified Class Name would just be LeanFtTest, as in the example below from another test.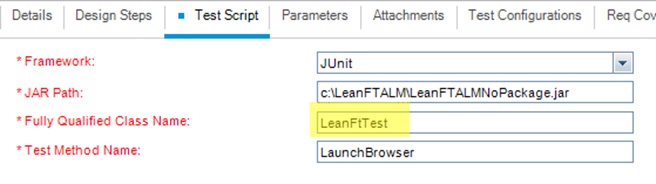
If you are unsure of what your Fully Qualified Class Name should be, you can open your test .jar in a tool like 7Zip to see the path. Find your .class file, and the path to it will reflect the Fully Qualified Class Name. Just add the class name at the end.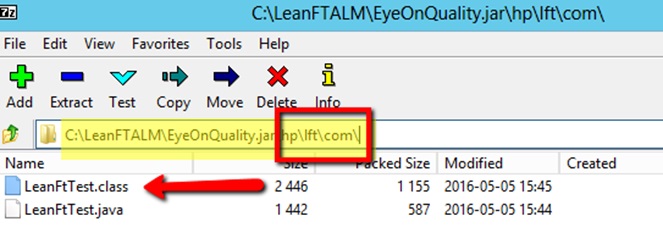
Test Method Name
This is the test method in the Eclipse project. In my case, I named it LaunchBrowser.
Set Up the Test Lab
Add your test from the Test Plan to the Test Lab like you would a GUI or API test. Click the Run or Run Test Set buttons, and run it the same way you would a GUI or API test.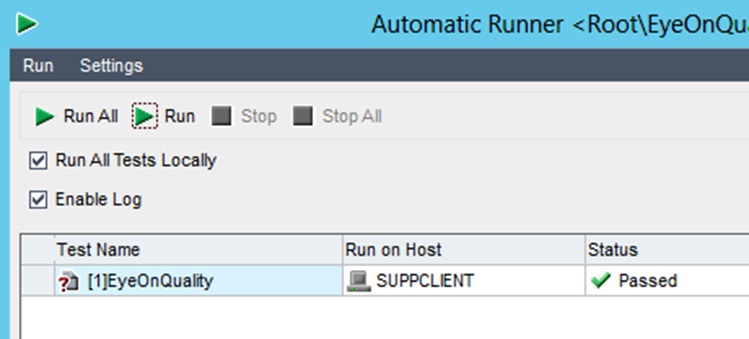
Viewing Results in ALM
Please see this post by clicking here.
Troubleshooting
If you get any failures when running, you can check the run logs to see what happened and troubleshoot.
Close the Automatic Runner prior to attempting to look at the logs.
The LeanFT.log file is located in the C: drive root. Open that in a text editor. Near the bottom of the file you will see a path that looks like the following.

The key to look for is the “\RUN\##\RUN_##_junit_log_##.txt” segment. Copy this path up to the \RUN folder and then paste it into a File Explorer address bar. The folder with the highest number represents the latest run from HPE ALM. Open the .txt file located within.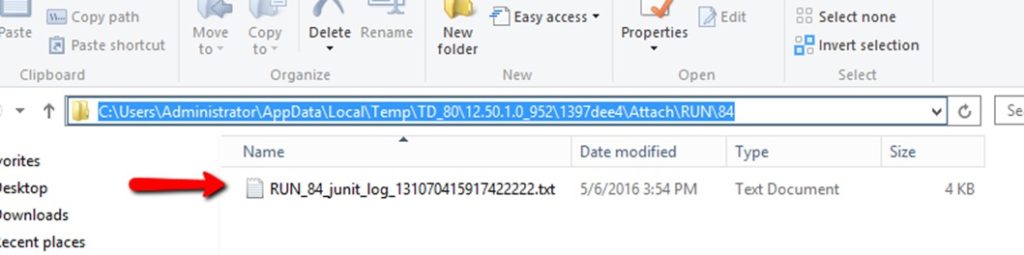
This log file should give you an indication of what caused the failure.
Update
When installing HPE UFT 12.53, it replaces the LFTRemoteAgent.exe.config file located in \Tools\RemoteAgent\ with a new version. Further, HPE has changed the format of the file. In previous versions, the Remote Agent Section looked like this:
<remoteAgent allowRun=”true”>
<nunitFrameworkPath>C:\Program Files (x86)\NUnit 2.6.4\bin</nunitFrameworkPath>
<testAssetDir>C:\LeanFTALM</testAssetDir>
<javaAssets>%CLASSPATH%;$LEANFT_INSTALL_DIR\SDK\Java/*;C:\JUnit\junit-4.12.jar;C:\JUnit\hamcrest-core-1.3.jar</javaAssets>
<!– <javaAssets>%CLASSPATH%;$LEANFT_INSTALL_DIR\SDK\Java/*;C:\JUnit\/*.jar</javaAssets> –>
</remoteAgent>
and now in 12.53 it looks like this:
<remoteAgent allowRun=”true”>
<nunit>
<framework version=”2.6.4″ path=”C:\Program Files (x86)\NUnit 2.6.4\bin” />
</nunit>
<testAssetDir>C:\LeanFTALM</testAssetDir>
<javaAssets>%CLASSPATH%;$LEANFT_INSTALL_DIR\SDK\Java/*;C:\JUnit\junit-4.12.jar;C:\JUnit\hamcrest-core-1.3.jar</javaAssets>
</remoteAgent>
The change is with the nunit tags.
Thanks Michael, really easy to understand. I was able to integrate Junit test with ALM by following these steps.
Just wondering, if you have tried TestNG / LeanFt 14.00 / ALM integration? I want to run testNG tests from ALM, but it doesn’t shows a testNG option in test plan (it only has JUnit / NUnit). Probably its version of ALM (ALM version 11.52.652 Patch level 8).
regards,
Bhart
Hi Michael,
i am still facing the issues in integration of LEAN FT and ALM.
Please share in detail what issues you are having.
Please be sure to include what versions of LeanFT and ALM you are using. Also, are your tests written in Eclipse or Visual Studio or something else?