Summary
The goal of this tutorial is to learn to create C# programs, learn to compile, execute, and debug them, learn unit testing, and learn some general error handling.
Overview
The .Net Framework is installed on every Windows machine so you can create and compile a program without installing any other components. Visual Studio is the integrated development environment (IDE) that makes creating, compiling, and debugging .Net Framework programs more straightforward, as well as containing additional libraries to facilitate unit testing and other actions.
.Net Framework
Components
The .Net Framework contains the Common Language Runtime (CLR) and a set of Base Class Libraries (BCL). The following is an outline of the components:
CLR
- Language(s)
- Application VM
- Security
- Memory management
- Exception Handling
Base Class Libraries (BCL)
- UI
- File IO
- Network
- Database
- Etc.
History
- 1.0
- Preview available July 2000 at PDC
- Released 2002
- 2.0
- Released 2005
- New features were Generics and Anonymous Methods
- 3.0
- Released 2006
- New features were WPF/WCF/WWF
- 3.5
- Released 2007
- New feature was LINQ
- 4.0
- Released 2010
- New features were Windows Mobile/CE
- 4.5
- Released 2012
- New features were Windows 8/Metro
Architecture
Code To IL
Code is written as text and compiled into an optimized form called Intermediate Language (IL) that is interpreted by the .Net Runtime.

IL To Code
IL can be reverse engineered back to code, although optimization the compiler made will make the code different that when it was originally written.

Tutorial – Write and compile a C# program without using Microsoft Visual Studio
We can create a sample CSharp program without even installing Visual Studio. Most all computers have .Net Framework on them so we already have the compiler. We can write in any text editor, then compile, then execute, all from the command line.
Sample1.cs
class Program
{
  static void Main()
  {
     System.Console.WriteLine("Time: " + System.DateTime.Now.ToString());
  }
}
Steps
- Open a Windows Command Prompt (Administrator)
- Window + R, cmd, Enter
- Change the directory to the .Net Framework directory
- cd \Windows\Microsoft.Net\Framework64
- Find where the correct csc.exe is
- dir csc.exe /s /b
- C:\Windows\Microsoft.NET\Framework64\v4.0.30319\csc.exe
- Copy the entire path of csc.exe
- Change to the location where you want to put Sample1.cs
- MD \Orasi\VS\Projects\Sample1
- CD \Orasi\VS\Projects\Sample1
- Create Sample1.cs
- Notepad Sample1.cs
- Type or paste in the code above
- Compile Sample1.cs
- C:\Windows\Microsoft.Net\Framework64\v4.0.30319\csc.exe Sample1.cs
- Fix any errors reported by the compiler
- Execute Sample1.cs
- Sample1.exe
Visual Studio Installation
- Web 2013
- http://www.visualstudio.com/en-us/downloads/download-visual-studio-vs.aspx
- Choose No optional components
- Uncheck Select All
- Cancel license Key
- Start Visual Studio
- Choose Visual C# Development settings
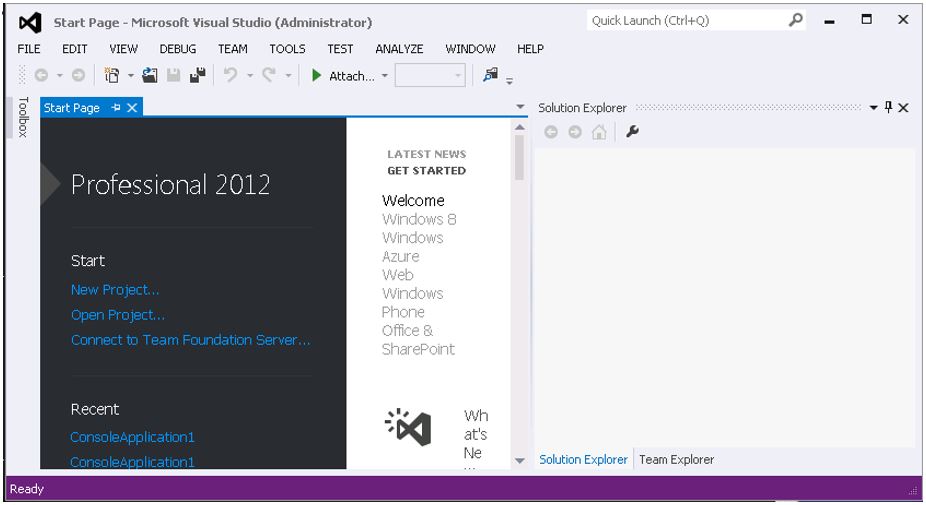
Default IDE
Tutorial – New IDE Project
- File, New, Project
- Visual C#, Windows, Console Application
- Location: c:\Orasi\VS\Projects
- ConsoleApplication1
- Uncheck Create directory for solution
New Project Dialog

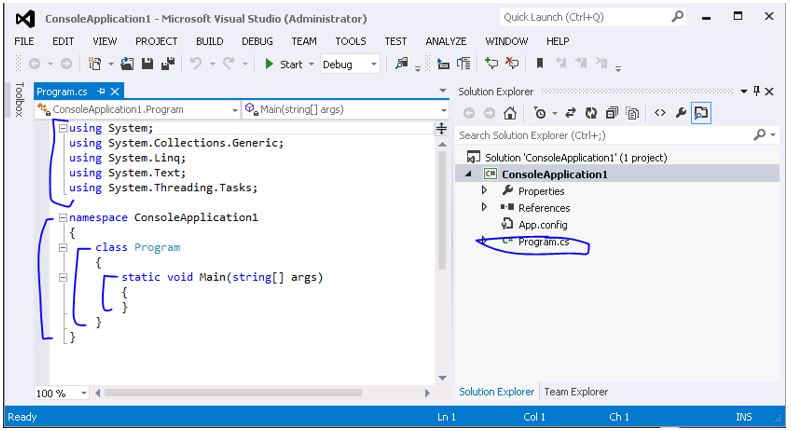
IDE Project Content
This program should be almost identical to the code we created earlier for Sample1.cs.
- By default it will
- Contain code in Program.cs
- Contain Using Directives on the top
- Contain a Namespace ConsoleApplication1 { class { static void Main() {}} }
Modifying the Code
Add a line of code inside Main like we did for the earlier example:
System.Console.WriteLine("Time: " + System.DateTime.Now.ToString());
Debugging the Code
Lets step through the code line by line in the Microsoft Visual Studio IDE. We will set a breakpoint on the line we added using F9, and step into the code using F10. The following are the description of the debugging commands:
- Compile – F6
- Run – F5
- Step over – F10
- Step into – F11
- Run to cursor – Ctrl+F10
- Breakpoint – F9
Tutorial – Unit Test Project
Follow these directions to create a 3 project Solution “Calculator” which will consist of a Class Library project, a Unit Test Project to test the class library, and a Windows Forms Application to use the class library.
CalculatorLib Project
This will be an assembly that contains the simple math logic.
Create Project
- File, New, Project
- Visual C#, Windows, Class Library
- Location: c:\Orasi\VS\Projects
- Name: CalculatorLib
Code for CalculatorLib
public class Calc
{
    public int Add(int x, int y)
    {
        return 0;
    }
    public int Subtract(int x, int y)
    {
        return 0;
    }
    public int Multiply(int x, int y)
    {
        return 0;
    }
    public int Divide(int x, int y)
    {
        return 0;
    }
}
CalculatorTest Project
This project will contain the unit test code that tests CalculatorLib.
Create Project
- Right-Click the “Calculator” Solution
- Add, New, Project
- Visual C#, Test, Unit Test Project
- Location: c:\Orasi\VS\Projects
- Name: CalculatorTest
Add CalculatorLib Reference
- Right-Click CalculatorTest References
- Add Reference…
- In tree on left click “Solution”, the “Projects”
- Choose the project CalculatorLib
- Click Ok.
Code for CalculatorTest
Add the following code to UnitTest1.cs in place of the code in class UnitTest1.
CalculatorLib.Calc calc = new CalculatorLib.Calc();

[TestMethod]
public void TestAdd1()
{
    int num1 = 1;
    int num2 = 1;
    int expected = num1 + num2;
    int actual = calc.Add(num1, num2);
    Assert.AreEqual(expected, actual);
}
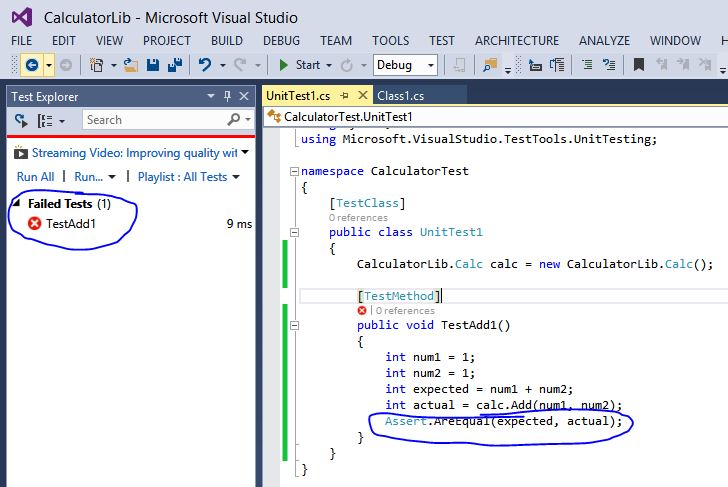
Compile and Run Unit Tests
- Compile – F6
- Test menu, Run, All Tests In Solution
- The test is expected to fail since the Add() method is not implemented.
Write all Unit tests
- Write the rest of the unit tests for Subtract(), Multiply(), Divide().
- Each unit test should fail just as the Add() unit test failed.
Implement Calculator Code
- Add some simple code to each method until the simple unit tests pass
- Here is example code:
public int Add(int x, int y)
{
    int result = x + y;
    return result;
}
Write a Negative Test Case
A negative test case is expected to fail. This means you purposely pass in invalid values and verify it throws the correct exception. Add the following negative test case code to UnitTest1.cs:
[TestMethod]
publicvoid TestDivide_Negative_Dbze()
{
    try
    {
        calc.Divide(1, 0);
        Assert.Fail("Expected DivideByZeroException exception.");
    }
    catch(DivideByZeroException)
    {
        //The test passed because it correctly caught the DivideByZeroException exception
    }
}
CalculatorUI Project
This is the UI project that uses the CalculatorLib project.
Create Project
- Right-Click the “Calculator” Solution
- Add, New, Project
- Visual C#, Windows, Windows Forms Application
- Location: c:\Orasi\VS\Projects
- Name: CalculatorUI
- Click OK.

Set As Startup Project
- Right-Click CalculatorUI
- Choose “Set as Startup Project”
Add CalculatorLib Reference
- Right-Click CalculatorTest References
- Add Reference…
- In tree on left click “Solution”, the “Projects”
- Choose the project CalculatorLib
- Click Ok.
Add Controls to the Form
- Toolbox (floating on left)
- Common controls, Text Box
- Properties (F4)
- (Name): textboxNum1
- Common controls, Text Box
- Properties (F4)
- (Name): textboxNum2
- Common controls, Text Box
- Properties (F4)
- (Name): textboxResult
- Common controls, Button
- Properties (F4)
- Text: Add
- (Name): buttonAdd

Implement Calculator Code
Double-click on the Add button and replace the buttonAdd_Click() code with the following:
CalculatorLib.Calc calc = new CalculatorLib.Calc();

privatevoid buttonAdd_Click(object sender, EventArgs e)
{
    int num1 = int.Parse(textBoxNum1.Text);
    int num2 = int.Parse(textBoxNum2.Text);
    int result = calc.Add(num1, num2);
    textBoxResult.Text = result.ToString();
}
Execute CalculatorUI
Press F5 and if Calculator is set as the startup project it should run and you will be presented with the form. Enter two values in textBoxNum1 and textBoxNum2 and then click the Add button. In the example below I used the values 1 and 1 which added to 2.

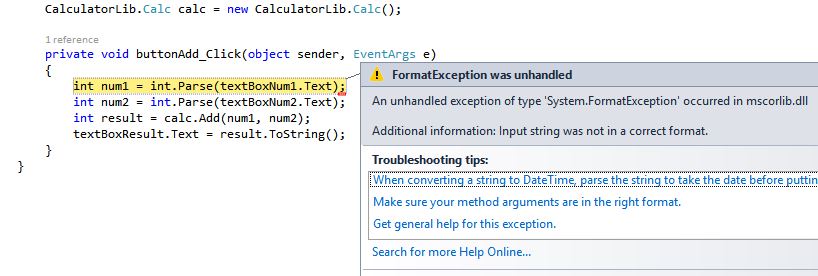
Adding Error Handling to CalculatorUI
You may have noticed we did not take into consideration that the user may put some invalid values in Calculator UI. Let’s add some error handling code to make sure that the user uses valid values, for example they cannot use non-integer characters as in my example below:
Implement Calculator UI Error Handling Code
Replace the buttonAdd_Click() code with the following:
privatevoid buttonAdd_Click(object sender, EventArgs e)
{
    try
    {
        int num1 = int.Parse(textBoxNum1.Text);
        int num2 = int.Parse(textBoxNum2.Text);
        int result = calc.Add(num1, num2);
        textBoxResult.Text = result.ToString();
    }
    catch(FormatException fe)
    {
        MessageBox.Show("The format of the input is invalid.");
    }
    catch (OverflowException oe)
    {
        MessageBox.Show("The format of the input is too large for the current data type.");
    }
}
Conclusion
We covered some general .Net, C#, and Visual Studio concepts such as program creation and execution, unit testing, and error handling.
Jon Fowler, Senior Consultant at Orasi Software